How to prepare your guitar for a Bridge Doctor
If you’re going to leave your acoustic guitar for extended periods, I always recommend you slacken off the strings to reduce the tension on the bridge or you may find yourself with a belly bulge. If this bit of news is arriving too late for your guitar, here’s how to prepare your guitar for installing the JLD Bridge Doctor.
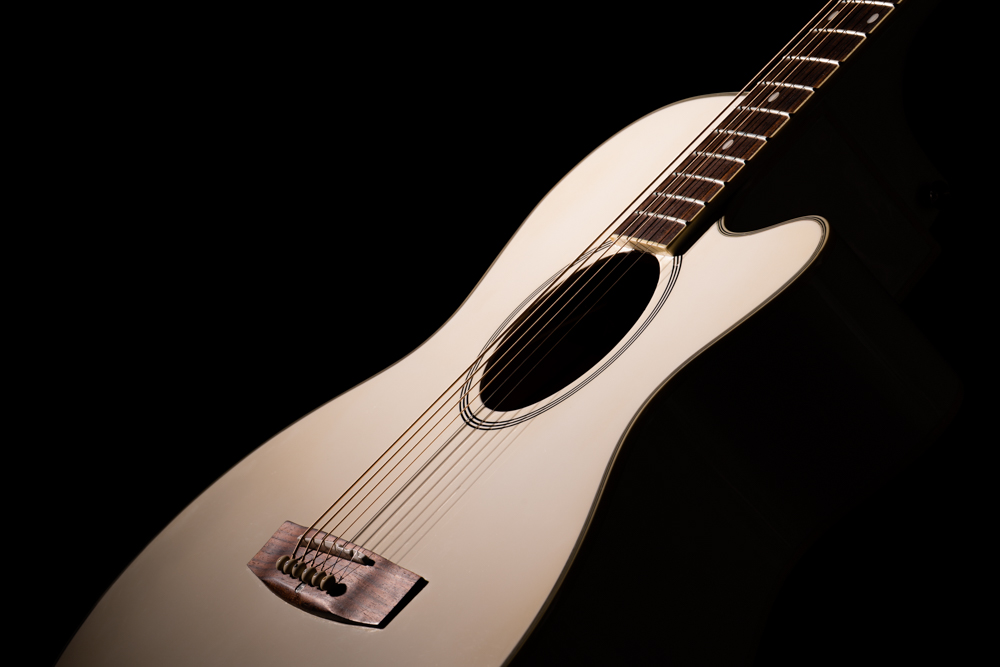
To illustrate the method, I’m using this Indie electro acoustic which arrived recently in a very poor condition. All the rosewood was bone dry and cardboard colour. The bridge had split in two and the back had come away from the guitar body completely. The guitar was still strung and the bridge pins were almost all visible with only the ball ends of the strings just holding on inside the guitar’s body.
The body of the guitar had severely bellied either side of the bridge area and behind the bridge. A flaw in the manufacture meant the bridge had been stuck down to the body on top of the paint. As the tension of the strings had pulled the bridge off, it was effectively only the strength of the paint that was holding the bridge down (not the glue). This gave way big time and pulled the guitar body out of shape.
Preparing the guitar for Bridge Doctor installation
I removed the strings and removed what was left of the bridge that was still attached to the guitar.
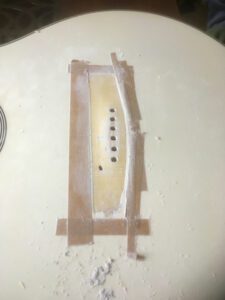
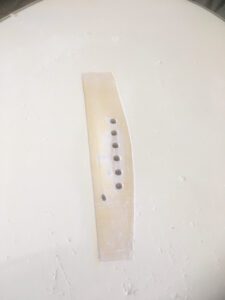
Next, I masked off the area of the top of the guitar which would be under the bridge and began to remove all the paint taking it back to bare wood (in this case spruce). You can clearly see the six string holes and the hole made for the under-saddle pickup. Later I would need to make another through the top of the guitar to fit the Bridge Doctor.
With this step completed, I took the bridge which was in two pieces and carefully glued it back together with Liquid Hide Glue. This glue has a long curing time so I had to clamp it, but once cured should be stronger, where it has been repaired, than the rest of the wood.
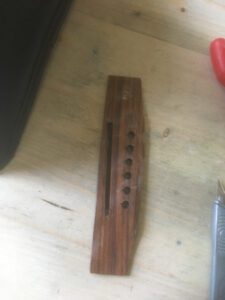
Here’s the area under the bridge cleaned off; it just needs a bit of a vacuum and tack cloth to remove all the dust.
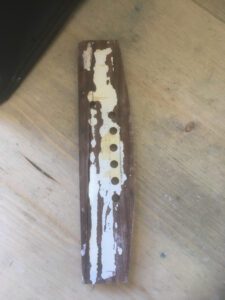
The bridge underside needed cleaning off too. You can see clearly that the glue to the paint was a better bond than the paint to the guitar body because a lot of it was stuck to the underside.
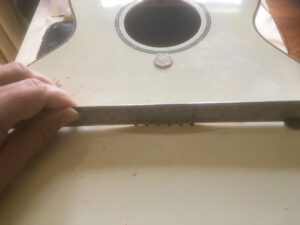
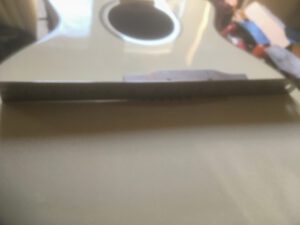
To illustrate the bulge, I put coins either side of the top and a straight edge ruler between them. See how the straight edge barely touches the middle four string holes side to side and the middle of the bridge area front to back. This should be pretty flat otherwise you can’t refit a bridge successfully. Note that this is called the belly and when you get the strings on pulling up at tension it would be significantly more pronounced.
This is what the Bridge Doctor will keep from reoccurring once it’s fitted.
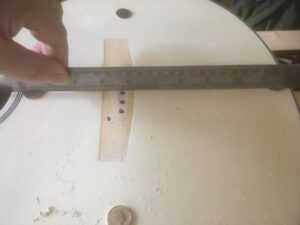
A millimetre of belly probably puts more than a millimetre on the action. So I needed to reduce the belly and fit the Bridge Doctor to keep the belly reduced and make it playable again.

What you are looking at here is a bridge caul from the Thompson’s Belly Reducer. Note the two magnets (shiny dots of metal) sunk into the aluminium caul.
Inside the guitar there is another aluminium caul which you select from a choice of shapes to exactly fit the bridge plate; it also has magnets and that really helps because it holds itself in place for clamping.
However, before fitting the cauls you need to do two things. First put some water on to boil in a pan that will fit both the cauls and heat them to 150 degrees Fahrenheit (about 66 degrees Centigrade).
Second, while that’s heating, you need to take a sponge loaded with warm water and dampen the bare wood area on the guitar top and the bridge plate inside the guitar too.
Once the cauls were up to temperature, I removed them from the water using heat resistant gloves and positioned them either side of the bridge area (one inside the guitar, the other outside).
Then, using three purpose-built clamps I tightened them down as hard as I could. I masked the guitar top again here just to protect the edge of the paint finish from the heat, probably don’t need to but I wanted to be extra careful on a white guitar.
I left the Thompson Belly Reducer to do its job for at least 48 hours before the next steps of refitting the bridge and fitting the Bridge Doctor inside the guitar.
About 55 hours later I removed the clamps, cauls and masking tape. As you can see with no coins under the straight edge there is a very slight gap, showing that the belly has been very much reduced in both directions. Importantly the whole bridge area is completely flat.
The next job is to fix the bridge back on the guitar. It’s important to locate the bridge correctly. I use a couple of M5 bolts down through the string holes with nuts done up lightly inside the guitar.
Before I did that, I needed to apply the glue. I use Fish Glue for this application. Excess wipes away really easily with a damp cloth. I used a good amount and expected it to squeeze out when I clamped it down. As I clamped it in place I removed the M5 bolts. I didn’t want to clamp it down with all my strength because that would squeeze out too much glue and the bridge would not be attached correctly and won’t be ready for the Bridge Doctor to be fitted.
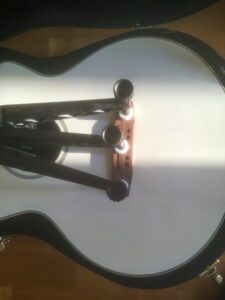
I left it for a minimum of 12 hours for the Fish Glue to completely cure and removed the clamps and cleaned up the string holes and pickup hole, inside the saddle slot, with a needle file.
Installing the Bridge Doctor
The next thing I did was fit the Bridge Doctor inside the guitar to make sure that it didn’t belly again.
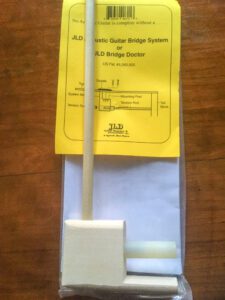
For this I needed to drill a hole down through the bridge and guitar top. I then fitted a screw down through the top of the guitar to the Bridge Doctor inside the guitar. I filled the countersunk hole with a mother-of-pearl dot.
Once fitted the Bridge Doctor is tensioned against the back of the guitar inside, to pull the top down. The great thing about the Bridge Doctor is that it not only keeps the guitar from bellying but also increases volume and sustain. Many high quality acoustic guitars have the Bridge Doctor fitted from new.
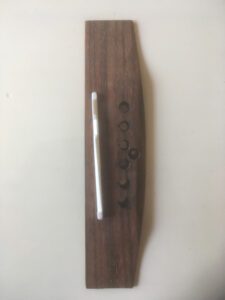

With the Bridge Doctor installed, I refitted the pickup through the top and under the saddle and refitted a new saddle as the old one had been disfigured by the whole bridge leaning. I cleaned and oiled the bridge, cleaned the guitar and gave it a setup.
Result is a totally flat guitar top able to deliver a great playing action with loud and sustaining output, thanks to the Bridge Doctor. More importantly it won’t belly again for the life of the instrument.
For information on guitar belly repair services from BBZ in High Wycombe and Buckinghamshire, using the JLD Bridge Doctor click here.
Follow us on Facebook or Twitter for news and offers from BBZGuitars. If you’ve got any other questions about guitar belly repairs or the Bridge Doctor, why not apply to join the BBZ Guitar Fix Group on Facebook and pose your questions in the group.